
YubiKeyをセットアップする
フィッシング攻撃からデジタルライフを守りましょう。さあ、始めましょう。
セットアップに向けて、お使いのYubiKeyとスペアキーをご用意ください。必須ではありませんが、コンピュータでセットアップすることをお勧めします。
最高の保護環境を整えるために、お使いのすべてのオンラインアカウントで設定を行うことをお勧めします。次のステップに進み、YubiKeyに対応しているサービスを確認しましょう。
YubiKey Bioへの指紋登録は、Windows、macOS、Linux、Chrome OSのいずれを使用しているかによって異なります。アクセスを確実にするために、最大5つの指紋テンプレートをキーに登録できます。問題が発生した場合は、個々のテンプレートを削除して再登録することも可能です。
Windows 10およびWindows 11

Windowsのサインインオプションを使用します。下のボタンをクリックして設定を開いてください。
Windowsを使用して登録する

macOS / Linux / Chrome OS
Chrome 90以降を使用してください。最初の指紋を登録するには、下のボタンをクリックしてください。追加の指紋については、登録ビデオをご覧ください。

Desktop Yubico Authenticator
デスクトップ版Yubico Authenticator 5.1以降では、サポートされているすべてのオペレーティングシステムで指紋の登録と管理が可能です。Windows、Mac、またはLinuxコンピュータでデスクトップ版Yubico Authenticatorを使用してください。Windows 10では、Yubico Authenticatorを管理者モードで実行する必要があることに注意してください。下のボタンをクリックして、デスクトップ版Yubico Authenticatorをダウンロードしてください。

1. Choose a YubiKey-compatible service
First, choose an online service that supports YubiKeys, such as Microsoft, Google or Dropbox.
Browse our Works With YubiKey Catalog to find all of the compatible services and view setup tutorials for popular services.
Keep in mind that it is up to each service on how/if they support YubiKeys.

2. Identify your account’s security options
Now that you’ve chosen a service, let’s check which security protocols the account supports.
1: Log in to your account and go to the security settings.
2: Look for one of the following:
- Two-Step Verification
- Two-Factor Authentication
- Multi-Factor Authentication
3: Within the sections listed above (or on their own), find one or more of the following:
- Security Key
- Passkey
-
Authentication app
(this may go by other names)
Every service is a little different, so the names might vary. Once you have a good idea of what security options your account supports, you’re ready to follow the instructions in the next step.
Differences between security key MFA, authentication apps, and passkeys

Security Key MFA uses physical devices and offers a high level of protection against phishing. It’s considered one of the most secure forms of MFA.
Yubico Authenticator as MFA is a software-based solution that relies on generating one-time codes. While it provides good security, it may not be as resistant to phishing as physical security keys. Unlike other Authenticators that store codes on vulnerable devices, our Authenticator ensures maximum safety by securely storing authentication codes on the YubiKey itself. Trust in a solution that prioritizes your security, setting us apart as the superior choice for safeguarding your digital assets.

Passkeys work using public key cryptography and proof that you own the credential is only shown to your online account when you unlock your phone. To sign into a website or app on your phone, you just unlock your phone — your account won’t need a password anymore.
3. Adding your YubiKey
Begin by plugging your YubiKey into a USB port.
Activate the NFC on your key. If your YubiKey supports NFC and it is your first
time using it, plug it into a powered USB port for at least three seconds to activate the NFC
function.
Set up your spare: We recommend setting up both your primary and spare YubiKeys at the same time.
Keep in mind that every service is a little different. The steps below are a general guide, and the setup process may vary depending on the service’s unique security settings.
Option 1: Security key MFA
1. Log in to your chosen service and navigate to your account’s security settings.
2. Look for the option to add a “Security key.”
3. Follow the instructions given by your service to add a security key, including any instructions prompted by your browser.

Option 2: Passkey
1. Download the Yubico Authenticator app.
2. Log in to your chosen service and navigate to your account’s security settings and find “authentication app.”
3. Open the Yubico Authenticator and find “add account”.
4. Scan your QR code provided by the service (make sure the QR code is clearly visible when you scan).
5. Save this QR code. You will need it to register additional keys.

Option 3: Authentication app
1. Download the Yubico Authenticator app.
2. Log in to your chosen service and navigate to your account’s security settings and find “authentication app.”
3. Open the Yubico Authenticator and find “add account”.
4. Scan your QR code provided by the service (make sure the QR code is clearly visible when you scan).
5. Save this QR code. You will need it to register additional keys.

4. Spare keys
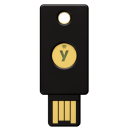
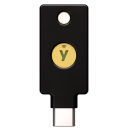
A spare key ensures you won’t lose access to your accounts if you misplace your primary key. We recommend setting up both your primary and spare keys at the same time.
A spare key can be a different form factor than your primary key, as long as it’s from the same YubiKey series.
5. Important tips
Login to test your YubiKey
Now that you have set up your YubiKey, try logging in. You should be prompted for your YubiKey.
If not, something may have gone wrong, or the service might be using “Trusted Devices.” Some services have a “Trusted Devices” feature that lets you skip verification codes and Security Key use on recognized devices.
Keep it safe
Treat your YubiKey like you would your house keys. Keep it in a safe place and do not share it with anyone. It is your personal security hero!
Software
Yubico Authenticator
The Yubico Authenticator stores your unique credentials on a hardware-backed Security Key, so you can take them with you on any device.
This means no more storing sensitive data on your phone and leaving your accounts vulnerable to cyber criminals. With the Yubico Authenticator, you hold your security in your hands.
Additional applications, like our
Yubico Authenticator
are generally not needed unless components like key configuration or authenticator codes are
required by the service/account you intend to secure.
Please note that, in many cases,
it is not necessary to configure your key prior to using it with online services. It is
recommended that you make a configuration change only if instructed to do so.
よくある質問
2FA(2要素認証)は、2つの異なる種類の要素を組み合わせて使用することで、ユーザーが主張するオンラインアイデンティティを確認する方法です。2FAに使用される要素には、「知っていること」(例:パスワードやPIN)、「持っているもの」(例:セキュリティキーや電話)、「本人であること」(例:顔認識)などがあります。詳細については、2FA用語集のページをご覧ください。
1つのYubiKeyには、メール、オンラインサービス、アプリ、コンピュータ、さらには物理적空間へのログインを保護するための複数の機能があります。YubiKeyの機能をどれか1つ使うことも、すべて使うこともできます。YubiKeyは汎用性が高く、ソフトウェアのインストールやバッテリーが不要なため、パッケージから出してすぐに使用できます。サービスにログインしてYubiKeyを追加するだけで、より安全なオンライン体験を楽しむことができます。
当社では常に、追加のYubiKeyでアカウントを保護することをお勧めしています。ただし、スペアのキーがなく、YubiKeyを紛失してしまった場合は、アカウントからロックアウトされるのを防ぐために、別の形式の2FAをアカウントに追加しておくことをお勧めします。万が一アカウントからロックアウトされた場合は、アカウント復旧の支援についてサービス側に問い合わせる必要があります。
はい、Yubicoでは常に複数のYubiKeyを持つことをお勧めしています。そうすることで、1つをメインキーとして使い、もう1つをスペアキーとして使うことができます。スペアキーを持つことの重要性は十分に確立されています。私たちは、家、車、私書箱、金庫など、人生の最も価値のある資産に対してスペアキーを持っています。当然のことながら、デジタルデバイスにもスペアキーが必要です!スペアキーがあれば、メインキーを紛失しても、最も必要なときに重要なアカウントにアクセスできなくなる心配がありません。つまり、スペアキーがあれば、アカウントからロックアウトされることを恐れる必要も、各アカウントへのアクセスを回復するために長時間の復旧プロセスや本人確認プロセスを経る必要もありません。
生体認証による認証に3回失敗すると、YubiKey Bioは指紋の要求を停止し、主要な認証メカニズムであるPINと通常のタッチにフォールバックします。生体認証がブロックされた状態は、USB端子に近い側の琥珀色のLEDがゆっくりと点滅し続けることで示されます。
生体認証のブロックを解除するには、次のように行います:
- セキュリティキーのPINを入力します。
- 緑色のLEDが点滅したら、キーのベゼルリングに触れます。
生体認証がブロックされた状態でなければ、ブラウザは生体認証を使用した認証を求めてくることに注意してください。
適用される製品保証および利用規約のコピーは、https://www.yubico.com/support/terms-conditions/ で入手できます。製品またはサービスにどの利用規約が適用されるかを確認する際にお手伝いが必要な場合は、カスタマーサポートまでお問い合わせください。
YubiKeyのセットアップでお困りですか?パーソナライズされたサポートについては、サポートにお問い合わせください。